Tech Insights · Feb 20, 2026
The Ultimate PHP Developer’s Workstation: Building a Powerhouse on Ubuntu 26.04
For a PHP developer, the operating system isn't just a platform; it's a primary tool. While macOS has its charm and Windows has its WSL2, nothing beats the raw speed and environment-parity of Native Linux.
In this guide, we’re going to build a professional-grade development environment from the ground up on Ubuntu 24.04/26.04 (Noble). We’ll cover everything from the terminal to multi-site Apache configurations and the "holy grail" of Linux dev: Fixing the Permission Wall.
1. The Foundation: A Modern Shell
A developer’s life starts in the terminal. We’re moving past the default Bash to Zsh with Oh My Zsh. This gives us better autocompletion, Git status indicators right in the prompt, and a customizable aesthetic.
Bash
sudo apt update && sudo apt upgrade -y
sudo apt install zsh git curl -y
sh -c "$(curl -fsSL https://raw.githubusercontent.com/ohmyzsh/ohmyzsh/master/tools/install.sh)"
2. The PHP Stack: No Compromises
We don't settle for the "standard" PHP versions in the Ubuntu repos. We use Ondřej Surý’s PPA to get the latest releases (PHP 8.4+) and the specific extensions required for Laravel and Symfony.
Bash
sudo add-apt-repository ppa:ondrej/php -y
sudo apt update
sudo apt install php8.4 php8.4-cli php8.4-fpm php8.4-mysql php8.4-curl php8.4-gd php8.4-mbstring php8.4-xml php8.4-zip php8.4-bcmath php8.4-intl libapache2-mod-php8.4 -y
Don't forget Composer, the heartbeat of the PHP ecosystem:
Bash
curl -sS https://getcomposer.org/installer | php
sudo mv composer.phar /usr/local/bin/composer
3. Mastering Apache: The Multi-Site Strategy
Most tutorials show you how to host one site on localhost. But real-world developers often juggle 3 or 4 projects. We’ll solve this by "stacking" Virtual Hosts on different ports.
The Port Configuration
First, tell Apache to listen for traffic on ports 81, 82, and so on. Edit /etc/apache2/ports.conf and add:
Apache
Listen 80
Listen 81
Listen 82
The Virtual Host Stack
In your 000-default.conf, you can stack your apps. This allows you to visit localhost:80 for Project A and localhost:81 for Project B.
Virtual Host Stacking example
You can manage multiple apps by adding <VirtualHost> blocks to sudo nano /etc/apache2/sites-available/000-default.conf:
Apache
# App 1 on Port 80
<VirtualHost *:80>
    DocumentRoot /var/www/cetrad-online-v2/public
    <Directory /var/www/cetrad-online-v2/public>
        Options Indexes FollowSymLinks
        AllowOverride All
        Require all granted
    </Directory>
</VirtualHost>

# App 2 on Port 81
<VirtualHost *:81>
    DocumentRoot /var/www/another-app/public
    <Directory /var/www/another-app/public>
        AllowOverride All
        Require all granted
    </Directory>
</VirtualHost>
Run sudo a2enmod rewrite && sudo systemctl restart apache2 after saving.
4. Solving the "Permission Denied" Headache
This is where most Linux beginners give up. By default, /var/www belongs to the root user. If you git clone into it, you can't edit files. If you change permissions to 777, you create a security nightmare.
The "Professional Matrix" Solution:
We make you the owner of the folder, but we keep the Web Server (www-data) as the group owner.
Bash
# 1. Take Ownership
sudo chown -R $USER:www-data /var/www/my-project

# 2. Set the "Standard" permissions
find /var/www/my-project -type d -exec chmod 775 {} +
find /var/www/my-project -type f -exec chmod 664 {} +

# 3. The Laravel Special
# Give the server write access to logs and cache
sudo chmod -R ug+rwx storage bootstrap/cache
Tip: Always set the "Sticky Bit" (sudo chmod g+s /var/www/html) so that new files created in the future automatically inherit the correct group.
5. Data & Caching: MariaDB + Redis
In 2026, MariaDB is the preferred community fork of MySQL, and Redis is non-negotiable for Laravel’s caching and queues.
Bash
sudo apt install mariadb-server redis-server -y
sudo systemctl enable --now mariadb redis-server
Pro Tip: Create a dedicated developer user so you don't have to use sudo every time you want to check your database via a GUI like TablePlus.
6. Secure Version Control
Stop using passwords for Git. Generate an Ed25519 SSH key. It's shorter, faster, and more secure than the old RSA keys.
Bash
ssh-keygen -t ed25519 -C "your_email@example.com"
cat ~/.ssh/id_ed25519.pub # Copy this to GitHub
7. Automating the Boring Stuff: Cron Jobs
Laravel’s Task Scheduler is a masterpiece of engineering, but it requires one "heartbeat" from the operating system to function.
Add this to your crontab -e:
Code snippet
* * * * * cd /var/www/my-project && php artisan schedule:run >> /dev/null 2>&1
Now, any task you define in your PHP code—from deleting old users to generating weekly reports—will happen automatically without you ever touching the server again.
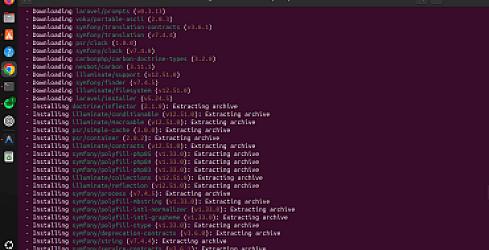
Troubleshooting: The "Corrupted Vendor" Trap
If you see errors like Class "Application" not found or Corrupted zip archive (0 bytes), your Composer cache is likely broken. The fix is the "Nuclear Reset":
rm -rf vendor composer.lockcomposer clear-cachecomposer install --prefer-dist
Final Thoughts
A native Ubuntu setup isn't just about code; it's about efficiency. By mastering the permission layer and utilizing the power of native system services like MariaDB and Redis, you eliminate the "lag" that often comes with Docker or virtualized environments.